 |
||||||||
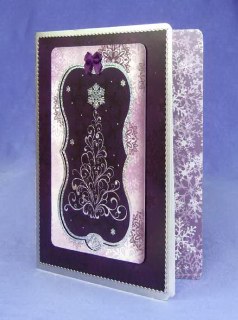
Card Making Project - Purple and Silver Christmas Tree Card
Made by Mary
This is the second of 2 cards made by Mary using the Hunkydory Sparkling Tree set of card toppers and coordinating backing card. The insert reflects the colours of the card and the shape of the card topper.
|
||||||||
 |
 |
|||||||
To make the card you will need:
|
To make the insert you will need:
|
|||||||
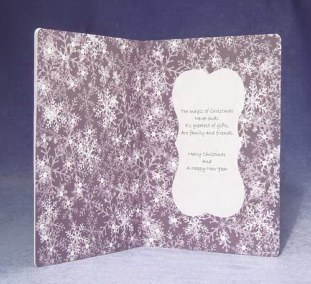
Making the Insert
Make the insert first as once you've made the card you won't have the topper to use as a template for cutting out the verse.
You can use your own verse or choose one of the many available on the Internet but if you want to copy Mary's it reads:
The Magic of Christmas
Never ends
It's greatest of gifts,
Are Family and Friends.
Merry Christmas
And
A Happy New Year
Copy the verse into your word processing document and centre the text. Print it out.
Push the Christmas tree card topper out and place it centrally over the verse. Draw around the card topper using a pencil. Remove the card topper and cut out the verse.
Trim the purple snowflake paper to 295mm so that it doesn't stick out beyond the edge of the card once it is glued into position. Using the regular corner rounder round each of the four corners.
Fold the purple snowflake paper so that you can see where the centre crease will be when it's opened out. Glue the verse centrally onto the right hand side of the paper.
Making the A5 Card
Using a scoring board score the A4 matt silver card down the middle to make an A5 creased card. Round the top and bottom right hand corners using a corner rounder.
Cut the purple background card to 145mm x 200mm and glue centrally to the front of the card using photo glue. Using the fine borders from the Christmas corners peel off sheet, edge the purple card with the borders all the way around.
Take the topper you pressed out earlier and flue centrally on the purple backing card using photo glue. Add a Christmas bells corner peel off to the centre top and bottom of the of the topper.
On the topper sheet cut the background that held the die cut topper so that it measures 103mm x 171mm leaving slightly more of the card at the top than at the bottom. Round each corner with the regular corner rounder.
Using 3D foam tape, line up carefully with the topper and glue into position.
Create a small purple bow and fix at the centre top using Didi glue dots.
Finally attach the insert to the card using double sided tape or a Funky tape runner.
********************************
Please feel free to copy this card for your own use. Our angel policy can be accessed via the Gallery home page.
_____________________________________________________________________________
|
||||||||
|
||||||||